Sumber: “Strategies to Mitigate Targeted Cyber Intrusions – Mitigation Details” yang dikeluarkan oleh ASD (Australian Signal Directorate) pada Februari 2014.
Dokumen tersebut berisi tentang pendahuluan, tahap-tahap intrusi siber bertarget, informasi sensitif, dasar pemikiran melaksanakan strategi-strategi mitigasi, serta rincian dari strategi-strategi mitigasi.
1. PENDAHULUAN
Dokumen ini memberikan informasi lebih lanjut mengenai daftar strategi ASD dalam memitigasi intrusi siber bertarget, termasuk referensi untuk mengontrolnya, di dalam Australian Government Information Security Manual (ISM) yang tersedia di situs http://www.asd.gov.au/infosec/ism/index.htm.
Pembaca sangat disarankan untuk mengunjungi website ASD untuk versi terbaru dari dokumen ini dan juga untuk mendapat informasi tambahan tentang menerapkan strategi mitigasi, yang tersedia di situs http://www.asd.gov.au/infosec/top35mitigationstrategies.htm.
Dokumen ini berfokus utama pada mempertahankan stasiun-stasiun kerja pengguna (user workstations) dan peladen-peladen (servers). Prinsip-prinsip dasar yang diperhatikan oleh panduan dalam dokumen ini berlaku untuk kegiatan keamanan ICT yang lebih luas. Sebagai panduan tambahan untuk penguatan (hardening) khusus perangkat, ASD juga menyediakan panduan untuk menggunakan perangkat mobile (seperti komputer tablet dan telepon pintar) secara aman, yang tersedia di situs http://www.asd.gov.au/publications/csocprotect/enterprise_mobility_bring_your_own_device_byod_paper.htm.
2. TAHAP-TAHAP INTRUSI SIBER BERTARGET
Tidak ada strategi tunggal yang dapat mencegah suatu intrusi siber bertarget. Organisasi seharusnya memastikan bahwa strategi yang mereka pilih mengatasi semua tiga tahap tingkat tinggi dari intrusi siber yaitu:
Tahap
Tindakan
Metodologi
Tahap 1
Pengintaian untuk memilih target pengguna, eksekusi perangkat perusak (malware) dengan teknik intrusi yang dipilih.
Membuat situs web perusak, menjebol situs web resmi (dengan teknik “watering hole” atau “drive by download”) atau mengirim surel “spear‐phishing” dengan suatu pranala (hyperlink) atau konten yang berbahaya.
Tahap 2
Propagasi (perambatan) jaringan
Menggunakan kredensial akun yang telah dijebol atau menggunakan kerentanan-kerentanan yang dapat dieksploitasi.
Tahap 3
Eksfilterasi data
Mengekstraksi data dengan berkas arsip RAR/ZIP, kemungkinan besar dieksfilterasi via Jaringan Pribadi Maya (VPN) atau via koneksi akses jarak jauh lainnya.
2.1. Tahap 1: Eksekusi Kode
Musuh dalam dunia siber (selanjutnya disebut musuh siber) melakukan pengintaian untuk memilih target pengguna dan juga membuat situs web perusak atau menjebol suatu situs web resmi dengan teknik serangan “drive by download” atau “watering hole”.
Teknik serangan “drive by download” dapat membuat pengguna tanpa sadar mengunduh perangkat perusak dari tautan jebakan yang dibuat musuh siber. Dengan teknik serangan “watering hole”, musuh siber akan menerka atau mengamati situs-situs web apa saja yang sering dikunjungipengguna-pengguna, kemudian menginfeksisatu ataulebih situs-situs web tersebutdenganperangkat perusak. Urutan tahapan dari kedua jenis teknik serangan tersebut dapat dilihat pada gambar 2 dan 3.
Gambar 2 Diagram Tahapan dari Serangan “Drive by Download“
Gambar 3: Diagram Tahapan dari Serangan “Watering Hole“
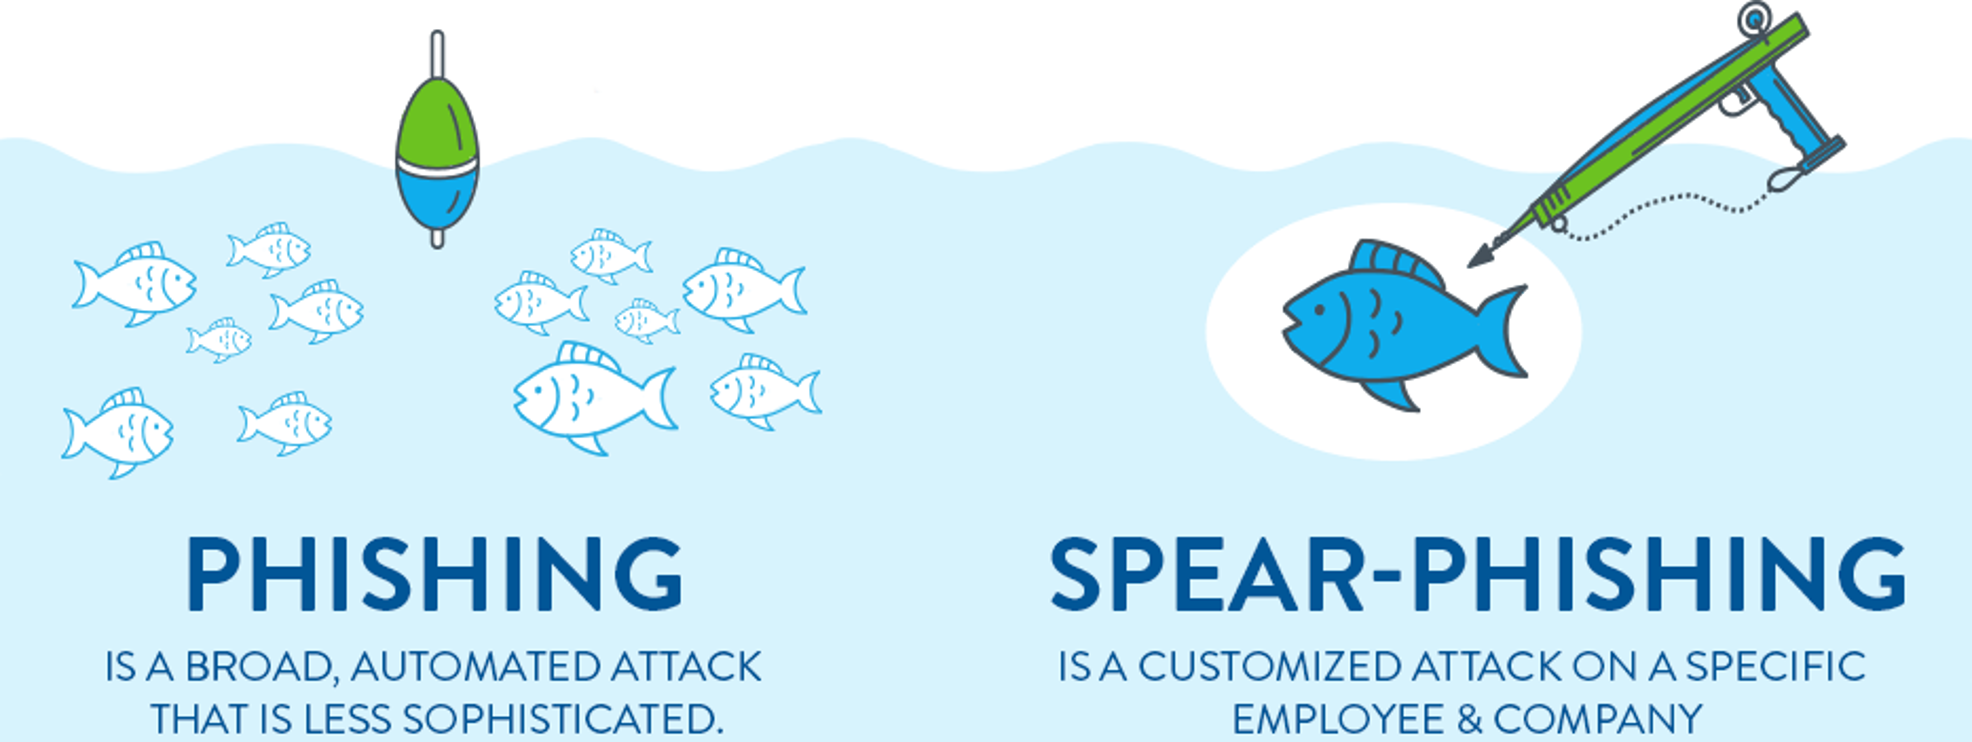
Selain cara di atas, musuh siber dapat menyerang dengan mengirim surel berbahaya “spear phishing” kepada pengguna yang ditargetkan. Surel tersebut dapat berisi pranala (hyperlink) ke suatu situs web dengan konten berbahaya, atau berisi lampiran surel berbahaya seperti berkas PDF atau dokumen Microsoft Office yang dapat dibentuk menjadi berkas arsip RAR/ZIP. Rincian tahapan dari teknik serangan dapat dilihat pada gambar 4.
Gambar 4: Diagram Tahapan dari Serangan “Spear Phishing“
Pengintaian menjadi lebih mudah bagi musuh siber jika nama dan alamat surel pengguna yang ditargetkan tersedia di situs web perusahaan tempat pengguna bekerja, di situs web jejaring sosial; atau jika pengguna menggunakan alamat surel kantor untuk tujuan yang tidak berkaitan dengan pekerjaan.
Perangkat perusak kemudian dieksekusi pada stasiun kerja pengguna dan sering dikonfigurasi supaya bertahan dengan mengeksekusi secara otomatis setiap kali pengguna memulai kembali (restart) dan/ atau masuk (log on) ke stasiun kerjanya. Perangkat perusak berkomunikasi dengan infrastruktur jaringan yang dikontrol oleh musuh siber (biasanya mengunduh perangkat perusak tambahan) memungkinkan musuh siber untuk melakukan kontrol stasiun kerja pengguna dari jarak jauh dan juga melakukan tindakan atau mengakses informasi apapun yang pengguna dapat lakukan.
2.2. Tahap 2: Propagasi Jaringan
Musuh siber umumnya menggunakan kredensial-kredensial akun yang telah mereka jebol atau kerentanan-kerentanan yang dapat dieksploit dalam stasiun-stasiun kerja dan peladen-peladen lain dari perusahaan untuk memropagasi (berpindah ke samping) jaringan demi menemukan dan mengakses informasi sensitif. Propagasi jaringan ini dapat terjadi secara cepat pada jaringan yang segmentasi dan segregasinya tidak memadai, terutama saat dua atau lebih stasiun kerja aau peladen berbagi frasa sandi administrator lokal yang sama. Informasi yang diakses sering kali termasuk berkas Microsoft Office, surel PST Outlook, PDF serta informasi yang tersimpan dalam basis-basis data (databases).
Berikut adalah tipikal informasi sensitif yang musuh siber akses:
rincian tentang pengguna termasuk hierarki organisasi, nama-nama pengguna beserta kata sandinya termasuk kredensial untuk akses jarak jauh.
informasi sistem termasuk rincian konfigurasi dari stasiun kerja, peladen, dan jaringan.
Frasa-frasa sandi mungkin disimpan sebagai hash kriptografi untuk menggagalkan musuh siber. Namun ternyata tersedia perangkat lunak beserta stasiun kerja tunggal gratis atau layanan komputasi awan untuk umum yang mungkin mampu dengan cepat dan murah memecahkan hash tersebut untuk mendapatkan frasa-frasa sandi. Hash tidak akan mudah dipecahkan jika semua pengguna memilih frasa sandi yang sangat kuat yang di-hash dengan tepat menggunakan algoritma yang kuat secara kriptografi.
Penggunaan otentikasi single sign‐on dalam suatu organisasi mungkin secara signifikan menguntungkan bagi musuh siber. Namun di sisi lain, penggunaan yang tepat dari otentikasi multi-faktor justru membantu menghalangi musuh siber, terutama jika diimplementasikan untuk akses jarak jauh atau untuk saat pengguna melakukan tindakan hak istimewa seperti mengatur suatu stasiun kerja atau peladen, atau mengakses suatu tempat penyimpanan (repository) informasi sensitif.
2.3. Tahap 3: Eksfilterasi Data
Musuh siber biasanya menggunakan berkas arsip RAR/ZIP untuk mengompres dan mengenkripsi salinan informasi sensitif dari suatu organisasi.
Musuh siber mengeksfilterasi informasi tersebut dari jaringan, kadang dari suatu stasiun kerja tunggal yang “staging” (single “staging” workstation) atau peladen dalam jaringan organisasi. Musuh siber menggunakan protokol dan port jaringan yang tersedia yang diizinkan oleh tembok-api gerbang jaringan (gateway firewall) organisasi, seperti HTTPS/SSL dan HTTP yang terenkripsi, atau dalam beberapa kasus DNS atau surel.
Musuh siber dapat memperoleh kredensial-kredensial akun VPN (atau akses jarak jauh lainnya) dan menggunakan koneksi jaringan yang terenkripsi tersebut untuk mengeksfilterasi informasi, dengan tujuan “mengalahkan” jaringan yang berbasis pemantauan.
Musuh siber mempunyai beberapa stasiun kerja atau peladen dan akun-akun VPN (atau akses jarak jauh lainnya) yang telah mereka jebol dalam jaringan organisasi, yang dijaga sebagai pintu belakang (backdoor) untuk memudahkan pengumpulan dan eksfilterasi informasi lebih lanjut pada intrusi selanjutnya.
3. INFORMASI SENSITIF
Sebagai bagian dari penilaian resiko (risk assessment) yang dilaksanakan oleh perwakilan bisnis dan staf keamanan, organisasi perlu mengidentifikasi jenis dan lokasi informasi sensitif yang disimpan secara elektronis. Untuk tujuan dokumen ini, informasi sensitif mengacu pada informasi yang belum maupun yang sudah diklasifikasi yang diidentifikasi membutuhkan proteksi. Informasi semacam itu mungkin berada dalam berbagai lokasi termasuk dokumen submisi kementerian pemerintahan dan dokumen lainnya yang merincikan rencana pemerintah, dokumen perencanaan strategi, proposal bisnis, tender, notulensi rapat, laporan keuangan dan akuntasi, dokumen resmi, dan kepemilikan hak kekayaan intelektual.
Berdasarkan akses musuh siber terhadap suatu informasi yang spesifik, memikirkan tujuan pengintaian yang dilakukan musuh siber dapat memberikan pengetahuantentang siapa pengguna organisasi yang kemungkinan akan ditargetkan sebagai bagian dari intrusi siber. Dalam beberapa kasus, penargetan akan dilakukan pada rapat/ pertemuan berikutnya atau pada acara bisnis lainnya yang berhubungan dengan musuhsiber.
4. CALON-CALON UTAMA TARGET
Istilah “calon-calon utama target” menggambarkan tentang pengguna-pengguna dalam suatu organisasi yang paling mungkin menjadi target sebagai bagian dari tahap pertama intrusi siber bertarget, termasuk:
eksekutif-eksekutif senior dan para asistennya
staf help desk, admin-admin sistem dan jaringan, dan pengguna-pengguna lain yang memiliki hak istimewa administratif dari suatu sistem operasi atau aplikasi seperti basis data
semua pengguna yang memiliki akses ke informasi sensitif, termasuk informasi yang dapat memberikan pemerintah atau organisasi asing keuntungan strategis maupun ekonomi pengguna yang memiliki akses jarak jauh
pengguna-pengguna yang mempunyai akses jarak jauh
pengguna-pengguna yang pekerjaannya melibatkan interaksi dengan surel-surel yang tidak diminta masyarakat serta pengguna-pengguna internet yang tidak diketahui lainnya; termasuk pengguna-pengguna yang menangangi permintaan Kebebasan Informasi, staf media dan humas, serta tim SDM yang membaca lampiran-lampiran surel seperti lamaran-lamaran pekerjaan
5. DASAR PEMIKIRAN DALAM MELAKSANAKAN STRATEGI-STRATEGI MITIGASI
Organisasi-organisasi Australia yang memiliki akses ke informasi sensitif (termasuk semua lembaga pemerintah federal Australia) memiliki kemungkinan tinggi untuk dijebol oleh intrusi siber berkecanggihan rendah jika postur keamanan organisasi tidak memadai. Selain kerugian yang berdampak pada kesejahteraan ekonomi dan semua warga negara Australia (seperti kerugian yang mencemarkan nama baik suatu organisasi) dapat merusak kepercayaan masyarakat terhadap Pemerintah Australia, dan dengan boros menghabiskan sumberdaya moneter dan pekerja yang langka untuk “membersihkan” intrusi siber intrusi berkecanggihan rendah secara terus menerus.
Sebagian besar organisasi yang memiliki sumber daya moneter dan pekerja yang terbatas membutuhkan manajemen senior agar berkomitmen akanpentingnya melindungi informasi sensitif organisasi. Saat diimplementasikan sebagai suatu paket, empat strategi mitigasi teratasdapat mengatasi semua tiga tahap tingkat tinggi intrusi siber dan merupakan “sweet spot” yang memberikan peningkatan besar pada postur keamanan dengan investasi waktu, tenaga dan uang yang relatif kecil.
Setelah organisasi efektif menerapkan empat strategi mitigasi teratas (pertama pada penggunastasiun kerja yang paling mungkin menjadi target intrusi siber dan kemudian pada semua stasiun kerja dan peladen), strategi mitigasi tambahan kemudian dapat dipilih untuk mengatasi kesenjangan keamanan sampai tingkat risiko residual yang dapat diterima tercapai.
Selain menerapkan strategi-strategi mitigasi, organisasi memerlukan suatu rencana penanggapan insiden dan kemampuan operasional terkait, termasuk pencadangan luring (offline backup) yang dilakukan dan diuji secara rutin agar pulih dari intrusi siber. Mengembangkan dan menerapkan kemampuan ini membutuhkan dukungan dari staf teknikal dan perwakilan bisnis, termasuk pemilik-pemilik data, komunikasi-komunikasi korporat, staf humas dan staf hukum.
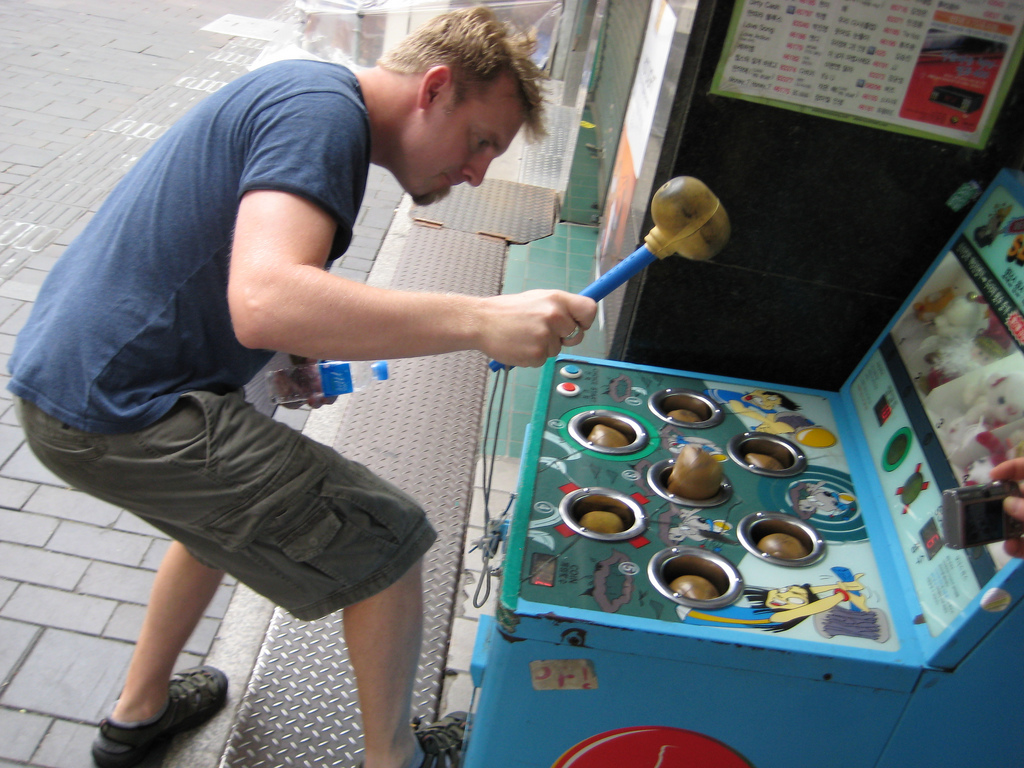
Saatteridentifikasi, intrusi siber perlu dipahami dahulu batas kewajarannya sebelum perbaikan dilakukan. Jika tidak, organisasi akan bertindak seperti orang yang sedang bermain “whack a mole“. Artinya, di saat organisasi sedang memperbaikistasiun-stasiun kerja dan peladen-peladen yang terjebol dan juga memblokir akses jaringan ke infrastruktur internet yang dikendalikan oleh musuh siber, musuh yang sama juga sedang menjebol stasiun kerja dan peladen lainnya menggunakan perangkat perusak dan infrastruktur internet yang berbeda untuk menghindari deteksi.
Gambar 5: Foto seseorang yang sedang bermain “whack a mole“
Untuk intrusi siberyang berkecanggihan lebih tinggi, ASD dapat membantu instansi pemerintah Australia dalam mengembangkan rencana strategi untuk menahan dan membasmi intrusi siber, dan juga meningkatkan postur keamanan suatu instansiakan persiapan untuk kemungkinan bahwa musuh siber akan tiba-tiba mencoba mendapatkan kembali akses ke stasiun-stasiun kerja dan peladen-peladen instansi.
Organisasi perlu menguji dan memutakhirkan rencana dan kemampuan penanggapan insiden secara rutin, berfokus pada pengurangan durasi waktu yang diperlukan untuk mendeteksi dan menanggapi intrusi maya berikutnya.
Organisasi harus terus menerus melakukan pemantauan dan mitigasi, menggunakan teknik-teknik otomatis untuk menguji dan mengukur efektivitas strategi-strategi mitigasi yang diimplementasikan, serta menerapkan strategi mitigasi tambahan yang diperlukan untuk melindungi informasi, stasiun-stasiun kerja dan peladen-peladen yangtelah diidentifikasi sebagai aset-aset penting organisasi. Organisasi yang telah menerapkan solusi-solusi Pencegahan KehilanganData (Data Loss Prevention) biasanya sudah mengidentifikasi lokasi informasiyang paling sensitif.
Hilangnya tambalan (patch), kelemahan-kelemahan lain yang terdapat pada stasiun kerja dan peladen, serta upaya intrusi siberyang terdeteksi harus secara rutin dan sistematis dilaporkan sehingga manajer senior memahami ancaman dan dapat membuat keputusan pemulihan resiko yang tepat.
Organisasi yang proaktif akan berinvestasi dalam menemukan intrusi siber baru, bukan hanya sekedar menunggu atau dan mengandalkan produk keamanan untuk mendeteksi intrusi siber. Memanfaatkan akses informasi mengenai tradecraft (metode pengumpulan informasi) dan indikator penjebolan yang dilakukan musuh siber, seperti yang disampaikan kepada instansi-instansi pemerintah Australia melalui portal web OnSecure, dapat membantu organisasi mengidentifikasi intrusi siber.
6. RINCIAN STRATEGI-STRATEGI MITIGASI
Konsep daftar putih merupakan tema utama strategi mitigasi, di mana aktivitas seperti komunikasi jaringan atau eksekusi program ditolak secara bawaan (default), dan hanya aktivitas yang secara eksplisit diizinkan administrator sistem dan jaringan untuk memenuhi kebutuhan bisnis saja yang diperbolehkan. Pendekatan tradisional daftar hitam hanya memblokir sedikit aktivitas yang tidak diinginkan, dan pendekatan ini reaktif, memakan waktu dan memberikan keamanan yang lemah.
Terdapat 35 macam strategi mitigasi yang dibahas ASD, yaitu:
Membuat Daftar-putih Aplikasi
Melakukan Penambalan (Patch) pada Aplikasi
Melakukan Penambalan (Patch) pada Kerentanan-kerentanan Sistem Operasi
Membatasi Hak Istimewa Administratif
Konfigurasi Penguatan (Hardening) Aplikasi Pengguna
Analisis Dinamik secara Otomatis
Mitigasi Exploit yang Umum Digunakan pada Sistem Operasi
Sistem Pendeteksi/Pencegah Intrusi Berbasis Host
Menonaktifkan Akun-akun Administrator Lokal
Segmentasi dan Segregasi Jaringan
Otentikasi Multi-faktor
Aplikasi Tembok-api (Firewall) Berbasis Perangkat Lunak, Memblokir Lalu Lintas Jaringan yang Masuk
Aplikasi Tembok-api (Firewall) Berbasis Perangkat Lunak, Memblokir Lalu Lintas Jaringan yang Keluar
Ekonomi syariah adalah sistem ekonomi yang mengimplementasikan nilai dan prinsip dasar syariah, bersumber dari ajaran agama islam nilai dan prinsip syariah yang berlaku universal dalam segala aspek kehidupan, termasuk dalam kegiatan ekonomi dan keuangan. [Dadang2020]
Ekonomi Islam adalah cabang pengetahuan yang bertujuan mewujudkan kesejahteraan manusia melalui alokasi dan distribusi sumber daya yang langka sesuai dengan ajaran Islam tanpa terlalu membatasi kebebasan individu, mewujudkan keseimbangan makroekonomi dan ekologi yang berkelanjutan [Umer Chapra 2000]
Nilai Dasar
Nilai dasar yang membedakan ekonomi Islam dengan ekonomi lain adalah sebagai berikut:
Kepemilikan
Keadilan dalam berusaha
Kerja sama dalam kebaikan
Pertumbuhan yang seimbang
Prinsip-prinsip Ekonomi Islam
Prinsip ekonomi Islam adalah sebagai berikut:
Pengendalian harta individu
Distribusi pendapatan
Optimalisasi bisnis
Transaksi keuangan
Partisipasi sosial
Transaksi muamalah
Karakteristik Ekonomi Islam
Adil
Tumbuh sepadan
Bermoral
Beradab
Tujuan Ekonomi Islam
mencapai kebahagiaan di dunia dan akhirat
Referensi
[Dadang2020] Dadang Muljawan, Priyonggo Suseno, Wiji Purwanta,Jardine A. Husman, Diana Yumanita, Muh. Nurdin B., Budi Hartono, Khairanis, Syaerozi, Wawan Kusumah, Suci Permata Dewi, Ekonomi Syariah Untuk Sekolah Menengah Atas Kelas X, Bank Indonesia, Jakarta 2020. https://www.bi.go.id/id/edukasi/Documents/BUKU%20EKSYAR%20SMA.pdf
Chapra M Umer (2000), Sistem Moneter Islam, Jakarta: Gema Insani Press.
Writing a scientific article: A step-by-step guide for beginners
We describe here the basic steps to follow in writing a scientific article. We outline the main sections that an average article should contain; the elements that should appear in these sections, and some pointers for making the overall result attractive and acceptable for publication.
The vast majority of scientific journals follow the so-called ‘‘IMRAD’’ format, i.e. introduction, methods, results and discussion.
The introduction is of prime importance in grabbing the reader’s attention
The objective of the methods section is to describe exactly what you did, and how, in sufficient detail such that any average reader with the same resources at their disposal would be able to reproduce your study.
The aim of the results section is to describe what you observed, without commentary or discussion.
The discussion is where you interpret and explain the significance of your results, and how they fit into the wider picture of what has already been observed and reported on the same topic.
The reference section lists all the sources you have used as a basis to prepare your hypothesis, and build your research.
Ekonomi Sirkular di Indonesia telah dirintis oleh berbagai pihak:
Pemerintah
Industri
Akademisi
Lembaga Swadaya Masyarakat
Pemerintah
Pemerintah terutama membuat regulasi dan memberi insentif.
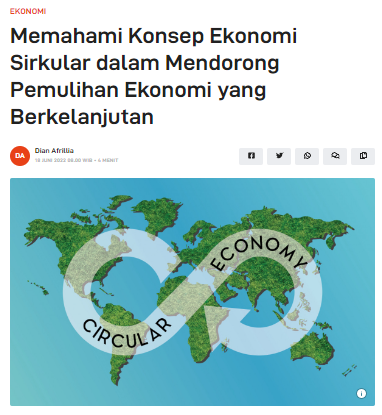
Memahami Konsep Ekonomi Sirkular dalam Mendorong Pemulihan Ekonomi yang Berkelanjutan
Pemerintah Indonesia telah mengadopsi konsep ekonomi sirkular sebagai bagian dari upaya Pemulihan Ekonomi Nasional. Transformasi ke arah ekonomi sirkular bertujuan untuk mengurangi dampak kegiatan ekonomi terhadap lingkungan dan mendukung pertumbuhan ekonomi jangka panjang. Ekonomi sirkular fokus pada reducing, reusing, dan recycling, dengan tujuan mengurangi konsumsi sumber daya primer dan produksi limbah. Ini melibatkan perubahan dalam desain bahan baku, produk, dan proses produksi untuk memungkinkan daur ulang dan siklus penggunaan yang lebih panjang.
Komitmen Ganjar, Libatkan Anak Muda Kembangkan Ekonomi Sirkular
Gubernur Jawa Tengah, Ganjar Pranowo, berkomitmen untuk mengembangkan ekonomi sirkular dengan melibatkan generasi muda kreatif. Ekonomi sirkular menjadi tren yang dapat mengatasi masalah lingkungan. Generasi muda sangat tertarik pada isu lingkungan dan berusaha mengolah sumber daya yang ada untuk menciptakan produk yang lebih baik. Contohnya, pengolahan sampah menjadi produk yang bernilai dengan bahan-bahan yang biasanya dibuang. Prakarsa pengembangan ekonomi sirkular di Jawa Tengah mendapatkan perhatian dari Badan Perencanaan Pembangunan Nasional (Bappenas) RI. Provinsi Jawa Tengah juga serius dalam mengembangkan energi baru terbarukan dengan banyaknya desa mandiri energi (DME). Ganjar Pranowo menekankan bahwa penghargaan bukanlah tujuan utama, melainkan dampak positif program tersebut pada masyarakat. [Tautan]
Industri
Implementasi ekonomi sirkular dalam skala besar
Akademisi
Perguruan tinggi menulis karya-karya ilmiah tentang ekonomi sirkular.
Webinar Membangun Ekonomi Sirkular Menuju Lingkungan Cerdas”
Dalam webinar “Membangun Ekonomi Sirkular Menuju Lingkungan Cerdas,” yang diselenggarakan oleh Smart City and Community Innovation Center (SCCIC), Dr. Yuliani Dwi Lestari dari ITB berbicara tentang model ekonomi sirkular untuk kota berkelanjutan. Dia memulai dengan membahas kualitas udara di Indonesia dan sektor energi sebagai penyumbang emisi gas rumah kaca terbesar di wilayah perkotaan. Selain itu, dia menyoroti konsep ekonomi linear yang masih menghasilkan limbah tak terdaur ulang dan menggambarkan manfaat ekonomi sirkular yang memungkinkan penggunaan barang yang selalu berputar sehingga limbah dapat dimanfaatkan kembali. Ekonomi sirkular dianggap sebagai faktor penting dalam mewujudkan kota berkelanjutan dengan fokus pada pilar ekonomi, sosial, dan lingkungan. Jakarta, sebagai perwakilan Indonesia, menempati peringkat 83 dari 100 negara dalam Sustainable Cities Index 2022, menunjukkan kompleksitas pengembangan kota berkelanjutan. Yuliani menekankan perlunya roadmap dan strategi yang jelas dalam mewujudkan kota berkelanjutan yang berfokus pada ketiga pilar tersebut. Tantangan kompleksitas perwujudan kota berkelanjutan harus dihadapi secara gradual dan melibatkan berbagai pemangku kepentingan. [Tautan]
Buku belajar Python dari awal: Cay Horstmann, Rance Necaise, “Python for Everyone, 2/ed”
Kalau mau memperdalam ke arah hacking, bisa pakai buku seperti: Justin Seitz, “Black Hat Python, Python Programming for Hackers and Pentesters”
Kalau mau memperdalam ke arah algoritma dan pengolahan data dan Artificial Intelligence secara umum: John V. Guttag, “Introduction to Computation and Programming Using Python 3rd edition”