Instalasi Redmine 4.01 di Ubuntu 19.04

Prosedur instalasi Redmine di Ubuntu secara umum dapat dibaca di http://www.redmine.org/projects/redmine/wiki/howto_install_redmine_on_ubuntu_step_by_step , namun untuk setiap versi Ubuntu ada kemungkina perbedaan-perbedaan kecil.

Instalasi Aplikasi Pendukung

Berikut ini proses instalasi aplikasi pendukung Redmine:

apt-get update
apt-get remove cryptsetup-initramfs #optional, karena kadang-kadang kalau apt-get upgrade jadi macet di sini
apt-get upgrade
apt-get install apache2 software-properties-common ruby-rmagick mysql-server mysql-client mysql-common
apt-get install ruby-dev build-essential libmysqlclient-dev libssl-dev gcc libmysqlclient-dev
apt-get install libapache2-mod-passenger # untuk integrasi apache-passenger
 

apt-get install imagemagick libmagickcore-dev libmagickwand-dev
apt-get install libmagickcore-dev # untuk rmagick , menghindari pesan "ERROR: Can't install RMagick 4.0.0." https://stackoverflow.com/questions/28324439/cant-install-rmagick-0-0-0-cant-find-magick-config
 

apt-get install redmine redmine-mysql
gem update
gem install bundler
bundle update

Konfigurasi Apache

edit file /etc/apache2/mods-available/passenger.conf 

existing:

PassengerRoot /usr/lib/ruby/vendor_ruby/phusion_passenger/locations.ini PassengerDefaultRuby /usr/bin/ruby

ditambah “PassengerDefaultUser www-data” menjadi:

PassengerDefaultUser www-data
PassengerRoot /usr/lib/ruby/vendor_ruby/phusion_passenger/locations.ini PassengerDefaultRuby /usr/bin/ruby

tambahkan symlink:

ln -s /usr/share/redmine/public /var/www/html/redmine

edit file /etc/apache2/sites-available/000-default.conf , tambahkan sebagai berikut:

<Directory /var/www/html/redmine>
    RailsBaseURI /redmine
    PassengerResolveSymlinksInDocumentRoot on
</Directory>

Tambahkan file lock untuk Gemfile

touch /usr/share/redmine/Gemfile.lock
chown www-data:www-data /usr/share/redmine/Gemfile.lock

Restart Apache supaya konfigurasi dibaca ulang:

service apache2 restart

cek di browser:

ke alamat http://192.168.0.203/redmine

default username: admin, default password: admin
setelah login akan diminta untuk mengganti password
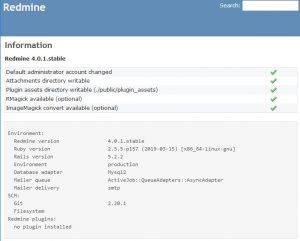
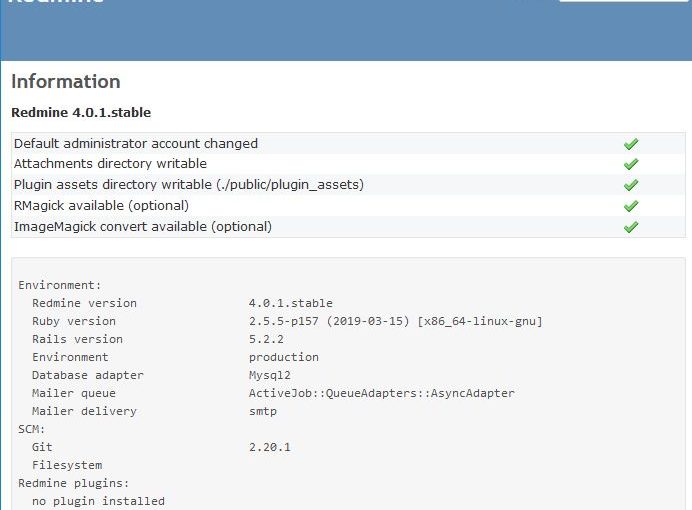
Pengecekan

Tampilan Administrator -> Information

Redmine 4.01 Information


Instalasi Eval AI di Ubuntu 17.10

Artikel ini adalah adaptasi dari prosedur instalasi di https://github.com/Cloud-CV/EvalAI


apt-get install openssh-server
apt-get install net-tools

Instalasi software dependencies:

apt-get install python2.7
apt-get install git
apt-get install postgresql

# Success. You can now start the database server using:
# /usr/lib/postgresql/9.6/bin/pg_ctl -D /var/lib/postgresql/9.6/main -l logfile start

apt-get install rabbitmq-server
apt-get install virtualenv
apt-get install python-psycopg2 (thanks to https://stackoverflow.com/questions/28253681/you-need-to-install-postgresql-server-dev-x-y-for-building-a-server-side-extensi)
apt-get install libpq-dev
apt-get install python-dev
apt-get install build-essential

# clone the EvalAI code

git clone https://github.com/Cloud-CV/EvalAI.git evalai

# Create a python virtual environment and install python dependencies.

cd evalai
virtualenv venv
source venv/bin/activate # run this command everytime before working on project
pip install -r requirements/dev.txt

Proses sampai tahap ini berhasil, selanjutnya masih perlu diujicoba:

cp settings/dev.sample.py settings/dev.py

Use your postgres username and password for fields USER and PASSWORD in dev.py file.

Create an empty postgres database and run database migration.

sudo -i -u (username)
createdb evalai
python manage.py migrate –settings=settings.dev

Seed the database with some fake data to work with.

python manage.py seed –settings=settings.dev

This command also creates a superuser(admin), a host user and a participant user with following credentials.

SUPERUSER- username: admin password: password
HOST USER- username: host password: password
PARTICIPANT USER- username: participant password: password

That’s it. Now you can run development server at http://127.0.0.1:8000 (for serving backend)

python manage.py runserver –settings=settings.dev

Open a new terminal window with node(6.9.2) and ruby(gem) installed on your machine and type

npm install

Install bower(1.8.0) globally by running:

npm install -g bower

Now install the bower dependencies by running:

bower install

If you running npm install behind a proxy server, use

npm config set proxy http://proxy:port

Now to connect to dev server at http://127.0.0.1:8888 (for serving frontend)

gulp dev:runserver

That’s it, Open web browser and hit the url http://127.0.0.1:8888.

(Optional) If you want to see the whole game into play, then start the RabbitMQ worker in a new terminal window using the following command that consumes the submissions done for every challenge:

python scripts/workers/submission_worker.py