Pendaratan Tanpa Roda: Pakistan International Airlines Flight 300

Flying: What’s the strangest incident that’s happened on a commercial airline flight?
Obaidullah Khawaja
Obaidullah Khawaja, Founder and CEO at Sovoia
Here’s a good one thats popular with us Pakistanis in an ironic sort of way. In 1986 Pakistan International Airlines Flight 300 had a belly landing at Islamabad airport because the pilot forgot to lower the landing gear. That’s right, he simply forgot to lower the gear on a 747 jet. There were no injuries and the plane continued to fly for 19 more years after repairs

EDIT: So now I do know exactly how this happened thanks to a reliable source (name can’t be taken because he still flies planes)

There were 3 people in the cockpit that day, the pilot, co-pilot and I think what’s called the 1st officer. Normally there is an electronic safety system that alerts the guys in the cockpit about things such as the landing gear not being down.

This system is generally found to be irritating by pilots who can be quite dismissive and macho – trusting their own skills. In those days it apparently also made some errors in logic. And finally it goes “Warning! Warning!” in a loud shrill voice. So it was standard for PIA pilots at least to switch off the circuit breaker for this system and switch it back at 1000 ft

It was standard for the cockpit crew to switch back the warning system and for each of them to check that the landing gear is down as part of their landing checklist.

None of these things happened so the pilot basically landed the plane thinking that the landing gear was down. He only realised after hitting the ground that it wasn’t

The pilot called HQ right after getting off the plane and tendered his resignation. He never flew again.

The co-pilot Capt Ahsan Aftab Bilgrami flew again but unfortunately died when the plane he was flying crashed in the Himlayas near Gilgit

Boeing were ecstatic, apparently this is one scenario they had not stress-tested for

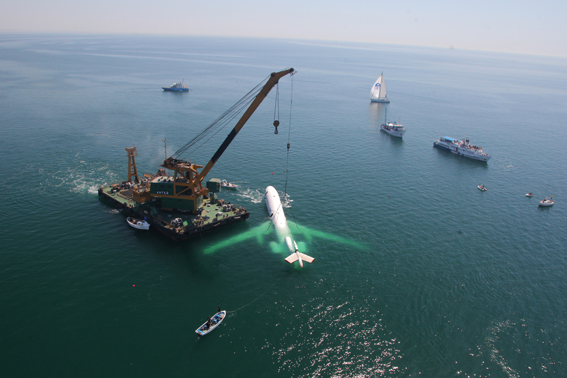
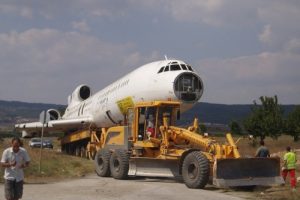
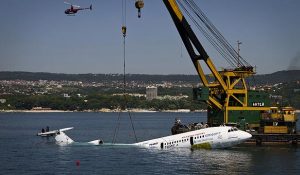
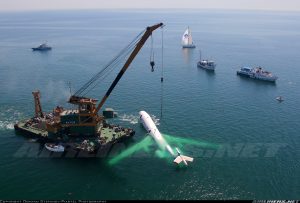
Here are some incredible pictures

EDIT: Since the above story has been so popular I thought I’d add another story from the 1970s which probably set the precedent for heroics by future generations of Pakistani pilots

According to http://www.historyofpia.com/acci…, the two pilots Salhejee and Mir had a misunderstanding about which one of them was flying the plane in the midst of a storm.

According to the site:

” The landing was going to be made by Capt. Mir. The weather was bad and Mir asked Salehjee to take over for the landing. Somehow, Salehjee didn’t hear the request, Mir thought that he had and so the approach was flown with nobody at the controls until impact! The pilots were unable to regain control of the aircraft and it veered off the runway. The Boeing 707’s main under carriage collapsed as it struck the runway very hard.

As seen in this photo, soon after aircraft’s crash landing PIA logo and titles were painted out from its tail and fuselage because Pakistan’s then Prime Minister Zulfiqar Ali Bhutto was due to arrive at the same airport on a VVIP PIA flight few days later. Later, this Boeing 707 was repaired and returned to active service with PIA”

Fly PIA – each plane has made history one way or the other

Pakistan International Airlines Flight 300
Pakistan International Airlines

Pemantik (Gas Lighter) Retan Flame


Retan Flame gas lighter


Retan Flame gas lighter

Berikut ini bagian dalam pemantik. Nampak tabung bahan bakar cair dan pembangkit tegangan tinggi.

Bagian dalam pemantik

Berikut ini manual yang tertera di bagian belakang kemasan.

Kemasan belakang
Kemasan belakang

Manual sesuai dengan yang tertera di kemasan belakang:

Art.No.RF12025
COMPLIED WITH ISO 22702 SAFETY STANDARD

WARNING

Use only as directed. Intentional misuse by deliberately, concentrating and inhaling the contents can be harmful or fatal. Follow instructions!
DANGER EXTREMELY FLAMMABLE CONTENTS UNDER PRESSURE

CAUTIONS IN USE:

KEEP OUT OF REACH OF, AND STORE AWAY FROM CHILDREN!

  • Contains inflammable gas under pressure.
  • When filled, contains flammable gas under pressure.
  • Handle carefully. Never play with lighter.
  • Keep lighter away from face and clothing when igniting or regulating flame.
  • Keep lighter away from sparks or open flame when refilling gas.
  • Do not keep lit for more than 30 seconds.a
  • Never puncture or incinerate container.
  • Never pierce lighter or throw into fire.
  • Never expose to heat over 50’C or to continuous sunlight.
  • Store in a cool and safe place. Always store with Lock Switch (if have) in locked position.
  • Lighter has been adjusted for perfect functioning, never make technical changes.
  • Having used the lighter, check that the flame is completely extinguished, i.e. that the burner valve is tightly closed. Dust and dirt can impair the lighter’s closing mechanism.
  • Failure to follow instructions and warnings (including those provided by grill or any other appliance manufacturer) may result in injury.
  • Extreme heat is present above the visible flame. Extra care should be taken to prevent burns, injury or fire.
  • Do not use to light cigarettes, cigars or pipes.

Regulation of flame height:

Keep the lighter away from your face and ignite, then turn the screw or flame adjuster switch clockwise (-) to decrease the flame (arrow towards minus), counter-clockwise (+) to increase the flame (arrow towards plus), adjust flame by flat head screwdriver if necessary.

Directions of refilling

When a suitable height or power of flame can no longer be obtained, please refill the lighter with gas, since the gas is composed of a high pressurized inflammable gas, please handle careful and follow the instructions given in ‘caution in use’. First of all close the flame adjuster switch completely by turning the screw clockwise (-) as far as it will go (arrow towards minus).Then put the lighter upside down on the table. Press the butane gas refill firmly and vertically, without adaptor, into the refilling valve. The refilling process is completed after spray-back occurs or 5~10 seconds. After refilling wait at least 2 minutes before lighting up and then adjust the flame height again (as specified above).

  • Use standard cigarette lighter butane refills or universal refills.
  • Follow manufacturer’s instructions on refill container (if it have additional one).
  • Be sure the flame is closed before refilling.
  • Be sure refill valve faces upward.
  • Place butane refill nozzle into open valve and press down softly.
  • Lighter is full when spray-back occurs.
  • Wait 2 minutes after refilling before using lighter.
Kemasan belakang
Kemasan belakang

Pemantik ini dapat diisi ulang, antara lain dengan gas dari Robinson Butane Fuel

SanDisk Ultra SDHC UHS-I Card 32 GB 30MB/s

Berikut ini memory card SanDisk 32 GB

Bagian depan berisi spesifikasi singkat:

  • SanDisk Ultra, SDHC UHS-I Card, 30MB/s, 32 GB
Kemasan SanDisk 32GB bagian depan

Bagian belakang berisi spesifikasi dengan lebih detail.

Keterangan penting:

  • Up to 30 MB/s read speed, write speed lower. Based on internal testing. Performance may be lower depending on host device, interface, usage conditions and other factors.
  • 1 GB = 1000000000 byte
  • Actual storage less
  • Full HD video (1920 x 1080) support may vary. See www.sandisk.com/HD
  • Water proof.
  • Shock proof
  • X-Ray proof
  • Sandisk,  RescuePro and Sandisk Ultra are trademarks of SanDisk Corporation,
  • The SDHC mark and logo are trademarks of SD-3C,LLC
Kemasan SanDisk 32GB bagian belakang

Berikut ini proses membuka kemasan tersebut. Memory card dibungkus dengan kemasan plastik tahan air.

Kemasan SanDisk 32GB bagian depan

Memory card berhasil dikeluarkan dari kemasan plastik

Kemasan SanDisk 32GB bagian depan

Perbandingan dengan kemasan SanDisk Ultra 32GB 40 MB/s dengan SanDisk Ultra 32 GB 30 MB/s

Perbandingan kemasan Sandisk 32 GB 40MB/s dan 30 MB/s
Memory card SanDisk 32 GB tampak belakang
Memory card SanDisk 32 GB tampak depan


Feature dan spesifikasi menurut http://shop.sandisk.com/store/sdiskus/en_US/pd/productID.291432500/parentCategoryID.11442500/CategoryID.58685300

Features

SanDisk Ultra SDHC and SDXC UHS-I card is the best choice for your point-and-shoot camera and camcorder to capture top quality Full HD† Video (1080p) and amazing pictures. Featuring speed class 10 for the highest video recording performance available and more speed to take better pictures instantly.

  • SDHC(16 & 32GB), SDXC (64GB & 128GB) form factor
  • Class 10 performance for Full HD† video (1080p)
  • Read speeds up to 30MB/s*
  • Capacities up to 128GB**
  • Writeable label for easy identification and organization
  • Jewel Case to protect your card during storing and archiving
  • Water-proof, temperature proof, X-ray proof, shock proof‡

NOTE: Not all devices support SDHC and/or SDXC memory card formats. Check with your device manufacturer for more details.

*Up to 30MB/s read speed; write speed lower. Based on internal testing; performance may be lower depending upon host device. 1 megabyte (MB) = 1 million bytes.
** 1 gigabyte (GB) = 1 billion bytes. Some capacity not available for data storage.
† Full HD video(1920x1080x30fps) and HD (1280x720x30fps) video support may vary based upon host device, file size, resolution, compression, bit rate, content and other factors. See www.sandisk.com/HD
‡ SD, SDHC and SDXC card formats up to 128GB only. See www.sandisk.com/proof for additional information.

Specifications

  • Form factor: SDHC (16GB and 32GB), SDXC (64GB & 128GB)
  • Available capacities: 16GB, 32GB, 64GB & 128GB
  • Performance/speed: Up to 30MB/s* read speed; write speed lower
  • SDHC card dimension: 0.94″ x 1.25″ x 0.08″ (24 mm x 32 mm x 2.1 mm)
  • Operating temperature: -13ºF to 185ºF (-25ºC to 85 ºC)
  • Storage temperature: -40ºF to 185ºF (-40ºC to 85ºC)
  • Compatibility: Compatible with all SDHC or SDXC supporting host devices
  • Security: Built-in write-protect switch prevents accidental data loss
  • Jewel case included

*Up to 30MB/s read speed; write speed lower. Based on internal testing; performance may be lower depending upon host device. 1 megabyte (MB) = 1 million bytes.


Warranty

Backed by a lifetime limited warranty. See additional warranty information.


Robinson Butane Fuel 120g

Robinson Butane Fuel , sering dipakai untuk mengisi ulang korek api gas ataupun pemantik oven gas.

robinson-butane-fuel-IMG_5496
Kemasan Robinson Butane Fuel 120 g
Robinson Butane Fuel
Kaleng Robinson Butane Fuel 120g


Robinson butane fuel, kaleng bagian belakang

Petunjuk menurut kaleng bagian belakang:

Directions:

  1. Remove the protecting plastic cover of refiller
  2. Insert the nozzle into the inlet valve of lighter, then push down firmly
  3. When overflow, withdraw the refiller quickly. The valve or refiller closes automatically
  4. In general filling time is approx. 5 – 15 seconds.
  5. This refiller can be used not only for Rubicon’s but also for other gas lighter by adaptor tip.

Caution

Do not use near open flame or burning cigarette

Please reserve the refiller in cool condition and avoid the heated radiator or fire.

Net weight 120 g

Rubicon Industrial Co. LTD. Tokyo Japan

Manual bahasa Indonesia

Manual bahasa Indonesia yang tercantum di sisi kemasan kardus:

PETUNJUK PENGGUNAAN

  1. Buka tutup kemasan Robinson isi ulang
  2. Masukkan ujung pipa Robinson isi ulang ke dalam klep lighter kemudian tekan.
  3. Setelah lighter terisi penuh, segera hentikan pengisian. Katup pipa Robinson isi ulang akan tertutup secara otomatis
  4. Pengisian lighter umumnya 5 – 15 detik
  5. Robinson isi ulang dapat digunakan untuk berbagai macam lighter

PERINGATAN

  • Jangan digunakan dekat dengan submer api atau rokok.
  • Simpan di tempat yang teduh dan hindarkan dari tempat yang panas.

Berat bersih 120g

Rubicon Industrial CO. LTD. Tokyo Japan.


Manual bahasa Inggris di kemasan


Infrared Thermometer GM320

Bentech GM320 Infrared Thermometer
Menampilkan temperatur dengan satuan Fahrenheit dengan backlight
Bentech GM320 Infrared Thermometer
Menampilkan temperatur dengan satuan Celcius dan tanpa backlight
Bentech GM320 Infrared Thermometer
Penampilan Bentech GM320 Infrared Thermometer


Batere AAA di gagang
Wadah batere AAA di gagang


Description

This BENETECH GM320 Infrared Thermometer (-50℃ – 320℃) applies the principle of infrared for inducing surface temperature of a object, particularly high temperature object. It is especially widely used in steel casting, machine components, furnace temperature, glass, etc. Sophisticated manufacture makes it feature high precision, high resolution and low repeat ability. LCD screen with backlight design enables you to get data easily and clearly even in the dark. This infrared thermometer is a complete combination of maximum / minimum /average value / D-value, high / low temperature alarm setting, data storage function, etc. It is convenient and helpful without contact object directly. What a practical tool!

Features

  • Non-contact accurate temperature measuring tool
  • Built-in laser aiming
  • Alternative ℃ / ℉ unit conversion function
  • Low battery indication
  • LCD display with backlight
  • Automatic data storage and automatic power off function
  • Button design is easy to use
  • High precision, high resolution and low repeatability
  • Lightweight and portable, it’s useful for lots of do-it-yourself projects

Specifications

  • Model GM320
  • Weight 123 g / 4.34 oz
  • Dimensions (14 x 7 x 3.5)cm / (5.51 x 2.76 x 1.38)
  • Color Yellow , Black
  • Material Plastic
  • Battery 2 x AAA batteries(Not included)
  • Measuring Range -50-330℃ (-58-626°F)
  • Resolution 0.1℃ or 0.1°F
  • Distance Spot Ratio 12:1
  • Package Includes
  • 1 x Infrared Thermometer
  • 1 x Manual


infrared-thermometer-depan
Kemasan bagian depan, berisi fitur ringkas

Fitur ringkas menurut kemasan:

  • Measuring range -50 ~ 330 Celcius (-58 ~ 626 Fahrenheit)
  • Accuracy +/- 1.5 Celcius
  • Resolution 0.1 Celcius or 0.1 Fahrenheit
  • Distance spot ration 12:1
  • Emissivity: 0.95 (fixed)
  • C/F unit selectable
  • Auto power off & Data hold
  • Laser ON/OFF selectable
  • Backlight ON/OFF selectable
  • 1.5V AAA battery x 2 PCS


infrared-thermometer-belakang
Kemasan bagian belakang, berisi petunjuk ringkas pemakaian

We use this unit to measure the temperature of:

  • Hot Water pipes
  • hot engine parts
  • Cooking surfaces
  • Hot Tubes & Insulation
  • Electrical Connetion
  • Ballasts in Electric Lights
  • Electric Motor & Bearings
  • Wine Coolers & Hot Asphalt
  • Fuse Panels & Transformers
  • Swimming Pools & Fish Tanks
  • Hot & Cold Food Products
  • Heating & Air Conditioning

Berikut ini pembongkaran GM320


GM320 dicopot bagian depannya
Mencopot tutup batere
Komponen bagian dalam GM320
Komponen utama yaitu sensor temperatur infra merah

Benetech GM320 Infrared Thermometer Instruction Manual


A. Introduction

This infrared thermometer is used for measuring the temperature of the object’s surface, which is applicable for various hot, hazardous or hard-to-reach objects without contact safely and quickly.

This unit consist of Optics, Temperature Sensor Signal amplifier, Processing circuit and LCD Display. The Optics collected the infrared energy emitted by object ancj focus onto the Sensor. Then the sensor translates the energy into an electricity signal. This signal will be turned out to be digital shown on the LCD after the signal amplifier and processing circuit.

B. Warning & Cautions

1.    Warning:

To avoid the potential situation may cause harm or damage to people, please pay attention to the following items:

  1. Before you use this unit, check on the plastic housing carefully. If there is aoy damage, do not use it.
  2. Do not point laser directly at eye or indirectly off reflective surfaces.
  3. Do not use this unit in the environment of explosive gas, steam or dusty.

2.    Caution:
To avoid the damage of the unit or the target, please protect from the following situations:

  1. EMF (electro-magnetic fields) from arc welders, induction heaters.
  2. Thermal shock (caused by large or abrupt ambient temperature changes-allow 30 minutes for unit to stabilize before use.
  3. Do not leave the unit on or near objects of high temperature

C. Distance to Spot size

1. When take measurement, pay attention to the Distance to Spot Size. As the Distance (D) from the target surface increases, the spot size (S) of the area measured by the unit becomes larger.
The Distance to Spot size of the unit is 12:1

***This unit is equipped with a laser, which is used% for aiming.

Figure 1

2. Field of view:
Make sure the target is larger than the unit’s spot size. The smaller the target the closer measure distance. When accuracy is critical, make sure the target is at least twice as large as the spot size.

D. Emissivity

Most organic materials and painted or oxidized surfaces have an emissivity of 0.95 (pre-set in the unit). Inaccurate readings will result from measuring shiny or polished metal surfaces. To compensate, cover the target surface with masking tape or flat black paint. Measure the tape or painted surface when the tape or painted reach the same temperature as the material underneath.

E. Operation

1. Operating the unit:

  • Open the battery door and insert 2*1.5V AAA batteries properly;
  • Pull the trigger to turn on the unit;
  • Aim at the target surface and pull the trigger, then temperature will be shown on the LCD. This unit is equipped with a laser, which is only used for aiming.

Figure 2

2. Locating a Hot Soot:

To find a hot spot, aim the thermometer outside of interest, then scan across with an up and down motion until you locate the hot spot. (Figure 3)

Figure 3


F. LCD display & Buttons

1. LCD display: Figure 4

a.    Data hold icon
b.    Scanning icon
c.    Laser on icon
d.    Backnight on icon
e.    Low Battery icon
f.    Temperature unit
g.    Temperature reading
Figure 4

2. Buttons: Figure 5

  1. Trigger: When pull the trigger, LCD display reading with SCAN icon. Release the trigger, display reading with HOLD icon for 7 sec(approx). Built-in 20 sec auto power off function.
  2. Laser on/off button
  3. Celsius / Fahrenheit switch button
  4. Back light on/off button: When backlight is on, any operations will activate the backlight for 7 seconds.

Figure 5

G. Maintenance

1.    Lens Cleaning:
Blow off loose particles using clean compressed air. Gently brush remaining debris away with a moist cotton swab. The swab may be moistened with water.
2.    Case cleaning: Clean the case with a damp spo-nge/cloth and mild soap.
Note:
1)    Do not use solvent to clean plastic lens.
2)    Do not submerge the unit in water.

H. Specification

Temperature Range -50° ~ 320° C (-58° ~ 626° F)
Accuracy
Resolution 0.1° C or 0.1° F
Repeatability 1% of reading or 1°C
Response time 500 mSec, 95% response
Spectral Response 8  ~ 14 um
Emissivity 0.95 preset
Distance to spot size 12:1
Operating Temperature 0 ~ 40° C (32° ~ 104°F)
Storage Humidity 10 ~ 90% RH non condensing up to 30° C (86° F)
Power 1.5V AAA * 2 battery
Typical battery life laser off: 12 hrs


Lakoni General Catalogue 2015

Lakoni 2015 katalog cover


Katalog Lakoni 2015 halaman 2Katalog Lakoni 2015 halaman 1
Katalog Lakoni 2015 halaman 1

Jenis proses las dan kelebihannya:

MMA (Manual Metal Arc)

  • + Tidak memerlukan gas tambahan
  • + Mesin Las tersedia dengan harga ekonomis
  • + Mudah melakukan penggantian bahan dengan mengganti kawat las saja
  • –  Hasil Las harus melalui proses pembersihan slag
  • – Waktu pengelasan terganggu dengan penggantian kawat las

MIG (Metal Inert Gas) / MAG (Metal Active Gas)

  • + Proses pengelasan lebih cepat dan tidak perlu mengganti kawat las, karena menggunakan kawat gulungan
  • + Proses pengelasan sangat mudah diajarkan
  • + Pilihan proses dengan gas / dengan kawat Flux Core

MIG dengan gas

  • + Tidak ada proses pembersihan slag
  • – Proses pengelasan harus memakai gas

MIG Flux Core

  • + Tidak perlu gas
  • – Harga Flux Core lebih mahal dibanding kawat las MIG standard

TIG

  • + Hasil las sangat rapih sehingga cocok untuk pekerjaan dimana hasil las dibutuhkan terlihat rapih
  • + Tidak ada percikan yang menempel ke material
  • + Dapat melakukan pengelasan material tipis
  • –    Sangat membutuhkan keterampilan pengelas
  • –    Membutuhkan gas untuk pekerjaan las
  • –    Proses pekerjaan lebih lambat dari proses yang lain
Katalog Lakoni 2015 halaman 2Katalog Lakoni 2015 halaman 2
Katalog Lakoni 2015 halaman 2
Katalog Lakoni 2015 halaman 3
Katalog Lakoni 2015 halaman 4
Katalog Lakoni 2015 halaman 6
Katalog Lakoni 2015 halaman 5
Katalog Lakoni 2015 halaman 6
Katalog Lakoni 2015 halaman 7

Technology Plasma 54 Kompressor

  • Volt: 220
  • Arus: 7 – 40 (10 mm Steel)
  • Kompressor Internal Unit

Kelebihan sistem Plasma Cutting:

  • + Dapat memotong material yang berkarat, sudah dicat dan dibentuk
  • + Tidak memerlukan tambahan gas yang mudah terbakar seperti LPG atau Acetyline (Hanya menggunakan Oxygen)
  • + Memotong lebih cepat dan hasil pemotongan lebih bersih dibanding dengan sistem Cutting Torch LPG atau Acetyline
  • + Dapat digunakan untuk material Steel, Stainless Steel, Galvanized Steel, Aluminium, Copper, Brass, dll.

GARANSI 1 TAHUN

Katalog Lakoni 2015 halaman 8

Plasma vs Oxy-Gas Cutting
Plasma Cutting:

  • + Pemotongan lebih cepat
  • + Tidak perlu menggunakan gas berbahaya, hanya memerlukan oxygen
  • + Hasil pemotongan lebih rapi
  • + Lebih mudah untuk proses belajar terutama faktor keamanan
  • –    Peralatan lebih mahal
  • –    Memerlukan listrik
  • –    Ketebalan potong yang terbatas, tergantung dengan kekuatan mesin

Oxy-Gas Cutting:

  • + Peralatan pemotongan relatif lebih murah dibanding mesin Plasma Cutting
  • + Tidak memerlukan sumber listrik untuk memotong
  • + Fleksibilitas ketebalan memotong dengan mengganti ukuran Tip
  • –    Harus menggunakan gas yang mudah terbakar
  • –    Hasil pemotongan kasar dan proses pemotongan lambat
  • –    Operator harus berpengalaman
Katalog Lakoni 2015 halaman 09
Katalog Lakoni 2015 halaman 10
Katalog Lakoni 2015 halaman 11
Katalog Lakoni 2015 halaman 12
Katalog Lakoni 2015 halaman 13
Katalog Lakoni 2015 halaman 14
Katalog Lakoni 2015 halaman 15
Katalog Lakoni 2015 halaman 16
Katalog Lakoni 2015 halaman 18
Katalog Lakoni 2015 halaman 17
Katalog Lakoni 2015 halaman 18
Katalog Lakoni 2015 halaman 19 (cover belakang_

Pustaka

SanDisk Ultra SDHC Card 32 GB 40MB/s

SanDisk Ultra SDHC Card 32 GB 40MB/s


Sandisk Ultra SDHC 32GB kemasan bagian belakang


Sandisk Ultra SDHC 32GB kemasan bagian depan


Penjelasan Singkat

Store lots of photos and Full HD videos—and transfer them quickly to your computer—using SanDisk Ultra SDXC and SDHC Memory Cards. Great for compact-to-midrange point-and-shoot digital cameras and camcorders, these memory cards offer read speeds of up to 40 MB/s** and are twice as fast as ordinary SDHC cards, allowing you to take pictures and transfer files quickly. SanDisk Ultra SDXC and SDHC Memory Cards come with up to 128 GB of storage and are resistant to water, extreme temperatures, x-rays, and shocks. A label allows you to note what’s on the card for easy identification.

  • Ideal for compact-to-midrange point-and-shoot cameras and camcorders
  • Twice as fast as ordinary SDHC cards**
  • Class 10 speed rating for recording Full HD videos**
  • Storage capacity of up to 128 GB**
  • Waterproof, temperature-proof, x-ray-proof, and shock-proof**

Overview

Twice as Fast as Ordinary SDHC Cards

With SanDisk Ultra SDXC and SDHC Memory Cards, you can take pictures and record Full HD videos smoothly using your compact to mid-range point-and-shoot digital camera or camcorder. SanDisk Ultra SDXC and SDHC Memory Cards deliver read speeds of up to 40 MB/s** and perform twice as fast as ordinary SDHC memory cards, allowing you to take shots and transfer photo and video files to your computer more quickly.

Great for Capturing Full HD Videos

SanDisk Ultra SDXC and SDHC Memory Cards have Class 10 speed ratings** for recording Full HD (1080p) videos. Enjoy smooth video recording performance whether you’re recording a family get-together, sporting event, or school play.

Up to 128 GB of Storage Space

SanDisk Ultra SDXC and SDHC Memory Cards come with a data storage capacity of up to 128 GB**, allowing you to take lots of photos and videos before having to change the card or transfer the files to your computer.

Resistant to Water, Temperature Fluctuations, and More

SanDisk Ultra SDXC and SDHC Memory Cards are waterproof, temperature-proof, x-ray-proof, and shock-proof. Snap pictures by the pool or carry your memory card with you through the airport and rest assured that your treasured memories are secure.

Compatibility and Warranty

SanDisk Ultra SDXC and SDHC Memory Cards are compatible with SDHC/SDXC enabled and SDHC-I/SDXC-I enabled devices. They are backed by a 10 year lifetime limited warranty**.

Spesifikasi


  • Form factor: SDHC (8GB, 16GB and 32GB),SDXC (64GB and 128GB)
  • Available capacities: 8GB, 16GB, 32GB, 64GB, 128GB**
  • Performance/speed: Up to 40MB/s** read speed; write speed lower
  • Card dimensions: 0.94in x.1.25in x.08in (24 mm x 32 mm x 2.1 mm)
  • Operating temperature: -13ºF to 185ºF (-25ºC to 85ºC)
  • Storage temperature: -40ºF to 185ºF (-40ºC to 85ºC)
  • Compatibility: Compatible with SDHC/SDXC and SDHC-I/SDXC-I devices
  • Security: Built-in write-protect switch prevents accidental data loss
  • Support: 10 year limited warranty**


Berikut ini beberapa istilah teknis di pada spesifikasi card SD tersebut di atas:

  • SDXC
  • SDHC
  • Full HD
  • Class 10

Ref:

TP-Link Gigabit PCI Network Adapter TG-3269

Berikut ini penampakan card ethernet TP-Link TG-3269

TP-Link Gigabit Ethernet


Box bagian depan
Box bagian depan


Box bagian belakang
Box bagian belakang

Spesifikasi Ringkas

  • 10/100/1000Mbps PCI Adapter
  • Complies with IEEE 802.3/802.3u/802.3ab Ethernet Standard

Description

  • TG-3269 is a 10/100/1000Mbps, 32-bit 33/66MHz PCI-bus Gigabit Ethernet adapter. With single UTP/STP and the Auto-Negotiation (Nway) function support, the Card can auto-negotiate 10Mbps, 100Mbps or 1000Mbps speed, and half or full duplex mode with its link partner (a hub, for example). Supports ACPI, compliant with PCI2.2. Full range of drivers are provided for major Operating Systems.

Spesifikasi Detail

HARDWARE FEATURES
Standards and Protocols IEEE 802.3, 802.3u, 802.3ab, 802.3x, 802.1q, 802.1p
CSMA/CD, TCP/IP, PCI Revision 2.1/2.2
Interface 32-bit PCI
1 10/100/1000Mbps RJ45 port
Network Media 10BASE-T: UTP category 3, 4, 5 cable (maximum 100m)
EIA/TIA-568 100Ω STP (maximum 100m)
100BASE-TX: UTP category 5, 5e cable (maximum 100m)
EIA/TIA-568 100Ω STP (maximum 100m)
1000Base-T: UTP category 5, 5e cable (maximum 100m)
Data Rates 10/100/1000Mbps for Half-Duplex mode
20/200/2000Mbps for Full-Duplex mode
LED Indicator 1000Mbps Link/Act, 100Mbps Link/Act, 10Mbps Link/Act, Duplex
Flow Control IEEE 802.3x Flow Control (Full-Duplex)
OTHERS
Certification CE, FCC, RoHS
Package Contents Network Adapter
Resource CD
Quick Installation Guide
System Requirements Me/NT/2000/XP/Vista/7,Linux/Novell Netware
Environment Operating Temperature: 0~40 (32~104)
Storage Temperature: -40~70 (-40~158)
Operating Humidity: 10%~90% non-condensing
Storage Humidity: 5%~90% non-condensing

Ref:

Pabrik Smartphone di Indonesia

Beberapa merek smartphone terkenal dari dalam dan luar negeri akan segera memproduksi smartphonenya di Indonesia. Alasan produksi ini macam-macam, bisa karena memanfaatkan ongkos produksi yang lebih murah, bisa juga karena ada aturan pemerintah Indonesia yang mewajibkan smartphone yang dijual di Indonesia memiliki kandungan lokal tertentu.

Berikut ini beberapa merek yang akan memproduksi smartphone di Indonesia:

1. Oppo (Tiongkok)

Oppo sudah berminat untuk mengeluarkan USD $30 juta untuk membuat pabrik di Tangerang. Target produksinya adalah 500 ribu smartphone per bulan di Indonesia.

Oppo N1
Oppo N1

Ref: http://www.indotelko.com/kanal?c=id&it=Oppo-dan-Samsung-Dipastikan-Buka-Pabrik-di-Indonesia

2. Haier (Tiongkok)

Haier mengeluarkan USD 1 juta untuk membuat pabrik di Indonesia. Target produksinya adalah 200 ribu smartphone per bulan.

Haier smartphone P867

3. ZTE , Zhongxing Telecommunication Equipment (Tiongkok)

ZTE mengklaim akan memproduksi smartphone di Indonesia, namun detailnya belum jelas.

ZTE Blade S6 Lux
ZTE Blade S6 Lux

4. Samsung (Korea)

Samsung sudah menyatakan akan membuat pabrik di Indonesia, namun detailnya belum jelas.

Samsung Galaxy S4 GT-I9500

Ref:

5. Axioo (Singapura)

Axioo sudah menjalankan 2 pabrik di Cakung dan Sunter. Saat ini Axioo mengklaim smartphonenya menggunakan 30% komponen lokal Indonesia, dan merencanakan akan meningkatkan kandungan lokal smartphonenya di masa depan.

Axioo Picophone M1
Axioo Picophone M1

6. Polytron (Indonesia)

Polytron selama ini sudah memproduksi perangkat elektronik seperti radio, speaker, TV, kulkas. Sejak 2011 Polytron sudah mulai memproduksi telepon genggam. Polytron merencanakan mengeluarkan smartphone di awal 2015.

Polytron Zap 5
Polytron Zap 5

7. Evercross

Pabrik Evercross berlokasi di Semarang, dan sudah beroperasi sejak Juni 2014.

Evercross A7A
Evercross A7A

8. Advan

Pabrik Advan berlokasi di Semarang. Target produksinya adalah 25000 smartphone dan 25000 tablet per bulan pada tahun 2015.

Ref: http://inet.detik.com/read/2014/03/21/085048/2532428/317/pabrik-ponsel-advan-bisa-mandiri-di-2016

9. Mito

Pabrik Mito berlokasi di Tangerang, mulai aktif sejak Agustus 2104. Target produksi 100 ribu smartphone dan tablet per bulan. Sebagian produk Mito dirakit di Tiongkok.

http://inet.detik.com/read/2014/06/05/171940/2601096/319/pabrik-mito-di-tangerang-siap-produksi-100-ribu-ponsel

10. Himax

Target produksi adalah tahun 2016 , dengan lokasi pabrik di Tangerang.

11. SPC

Pabrik SPC berlokasi di Tangerang, dengan produksi 200 ribu telepon per bulan. Pada tahun 2015 ini SPC merencanakan masuk ke produksi smartphone dan tablet.

12. Foxconn

Rencana Foxconn untuk masuk ke Indonesia masih maju-mundur, sampai saat ini belum jelas apakah akan jadi masuk atau tidak.

Ref:

  • https://www.techinasia.com/foxconn-letter-intent-jakarta-indonesia/
  • http://blogs.wsj.com/indonesiarealtime/2014/09/11/foxconn-demands-unrealistic-says-indonesias-finance-minister/

Sumber Gambar

  • http://www.vrworld.com/2013/09/24/oppo-wants-smartphones-to-be-innovative-introduces-the-oppo-n1/
  • http://www.haier.com/pk/products/phone/haier-phone/p867.shtml